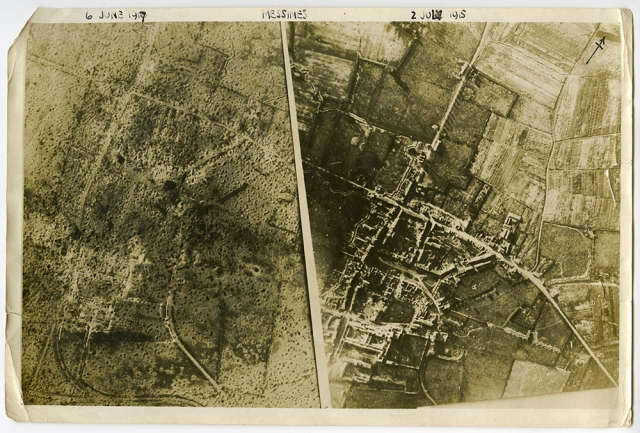
Battle of Messines Ridge centenary
7-14 June 1917

An often overlooked Allied success in the First World War
Messines Ridge is part of the arc of high ground in the south-east corner around Ypres in Flanders, to which the Germans tactically withdrew in autumn 1914 helping to form the Ypres Salient. From this vantage point the Germans were able to see just about anything the Allies did in the lower half of the Salient. The higher ground also enabled the Germans to be well dug in and protected from attack.
Tactical advantage
Removing the Germans from this strategic position was a key aim of the British to break the deadlock in Flanders. In some cases the ridge was nothing more than a small rise in the ground, yet still one that provided key tactical advantages. That had been the case at Hill 60 on the very edge of the arc where numerous battles had been fought by the British in an attempt to take the few metres of height that constituted high ground in the otherwise flat landscape.
Battles at Hill 60 had led to thousands of British casualties, the awarding of VCs and Paul Nash’s memorable landscape of horror. Ultimately it had led to frustration and no clear move forward for the Allies.
Planning the attack
The battle plan for the Attack on Messines demonstrated the learning that the British military leadership had gone through as a result of the events at the Somme. Planning started months before the attack, using the new ideas around mining and underground detonations. The attack was limited to a clear area, using well trained troops, a creeping barrage and in the air support. The planning had begun in 1916 by General Plumer who was determined to ensure the attack was successful with minimal loss of life to the Allies side.
Along the 9-mile stretch of the ridge mining groups from the UK, Australia, New Zealand and elsewhere dug 21 mine cavities. The physical effort to dig and secure the tunnels to get under the ridge was enormous. There was also the need to remove the earth and ensure air reached the miners and water was kept out. The whole time they were digging the Germans were listening out, trying to locate the tunnels. An estimated 8,000 metres of tunnels were dug.
By early June 1917 the mines were complete and packed with specially developed explosives. Some of the mines contained over 90,000 lbs of explosives. Plumer launched an artillery offensive for a week before the attack, knowing that the Germans would withdraw to their dugouts and then return to their battle stations with reserves coming up to support them as soon as the bombardment stopped. This was an essential part of the attack plan for the British; they wanted as many Germans on the ridge when the attack began.
The attack begins
The bombardment finished at 2.50am on 7 June and the Germans immediately went to their positions, waiting for an infantry attack. Instead at 3.10am Plumer gave the order for the mines to be detonated simultaneously. Over 600 tonnes of explosives created the largest man-made earth tremor then known; some say it was felt in London. 10,000 Germans were killed immediately.
The British infantry then advanced behind a creeping barrage, providing them with safety from any remaining Germans trying to defend what was left of their positions. Air cover to stop German air observation and most importantly to provide communication of how the troops were progressing and what support was needed was essential to the attack. It demonstrated to all around the growing significance and role of airplanes in conflict.
ANZAC and Canadian forces had fought alongside the British forces in the attack. The British forces had included Ulster Forces of Catholic and Protestant soldiers. Everyone was keen to finally push forward.
Capturing the ridge
In only a week the British attack had captured the ridge they had spent over two years staring at. It demonstrated that lessons could be learned in war and tactical changes combined with technology and understating could make a difference. The Germans were devastated by the attack, taking approximately 25,000 casualties and 10,000 missing including over 7,000 captured. The British had just under 25,000 casualties and of those that died their bodies lay in the CWGC cemeteries around Messines and the village of Wytschaete.
Sadly the successes of Messines have often been forgotten, overshadowed by the much larger battle that was to follow six weeks later. Spurred on by the success of Messines, Haig launched his offensive on the top section of the Ypres Salient – the Third Battle of Ypres. Of course the Third Battle of Ypres is now more commonly known as Passchendaele, and lasted for months rather than days, resulting in thousands of casualties and some of the worst conditions and memories of the whole war. Passchendaele’s failures overshadowed many of Messines successes.
However, this week let us remember a success in war while reflecting that any success in conflict comes with a cost.

